This article was originally posted at https://christinatruong.medium.com/refactoring-html-and-css-69de73a5fb88 and was kindly shared by Christina Truong. Check out more of her work at https://christinatruong.com.
(Prefer to watch a video? This article is a companion piece to my Decoded by Christina series on YouTube.)
Refactoring is the process of rewriting and restructuring the code to improve the design of the code base. This practice can be applied to any language but this article will focus on HTML and CSS. When refactoring, here are some goals to keep in mind:
Rewrite to reduce complexity. It’s easy to fall into the trap of over-engineering, especially when you’ve just learn a cool new trick. But try to keep in mind to only add what you need.
Make it reusable. Being able to reuse snippets of code means less code overall and more consistency.
Think about how you can make it flexible. This can help to make it easier to reuse and extend features by adding onto existing code snippets.
Make the code easy to read. Use whitespace, indentation and comments for organization. Show your intent by using descriptive class names and comments. Write your code as if you are writing it for someone else to understand. And in some cases you probably are! And even if you are only writing it for yourself, it’s not unusual to come back to a project months later and feel like you have to re-familiarize yourself with the codebase again.
Let’s take a look at some ways to refactor HTML and CSS.
Reduce HTML markup
Something that happens often when adding content and styles to our web projects is inadvertently using too much HTML markup. For example, the <div> element is often used to group or wrap elements to add CSS to them. But it’s not always necessary to throw a <div> around the element that needs to be styled. Every HTML element is its own box and can be styled. In this example, the CSS style will look the same whether you add it to the <h1> element or its container element.
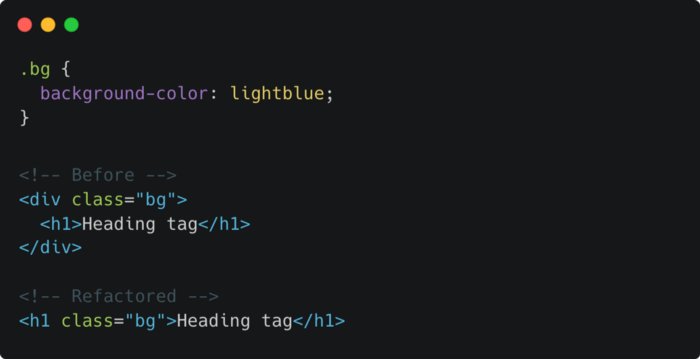
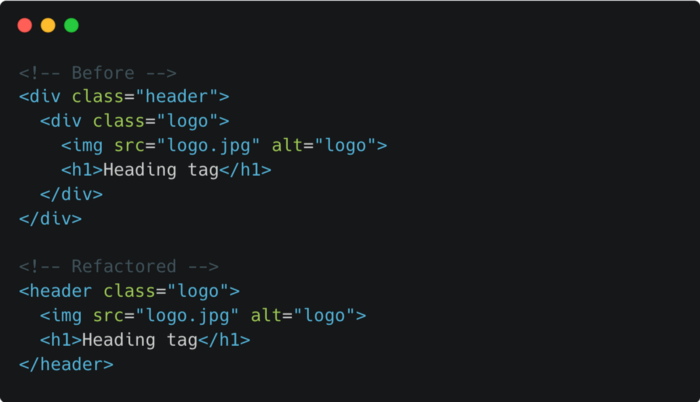
But you can and should use a <div> and other container elements (e.g. <header>) when multiple elements need to be grouped. Just remember to only add what you need and use semantic HTML tags instead if a <div>, when it makes sense to do so.
In the example below, I’ve removed the extra <div> in the refactored snippet and changed the outer <div> container to a semantic <header> element. I also moved the “logo” class to the header element instead, since it is now being used to group together the logo image and <h1>.
Create rules for writing CSS
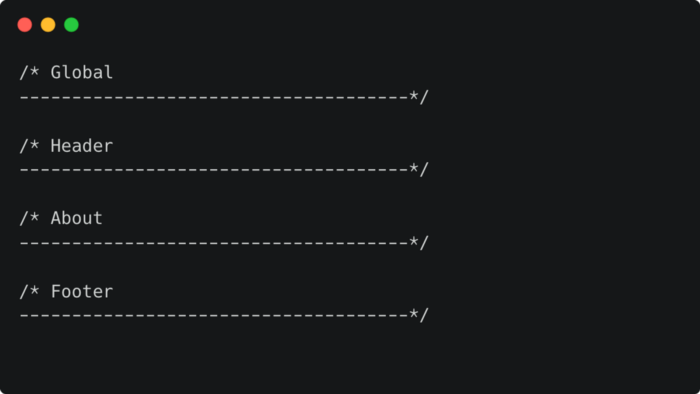
When it comes to CSS, organizing your code from the beginning can help reduce the amount of refactoring needed later. I use comments for grouping related CSS styles into sections or modules, to lower the chances of writing duplicate or extra code.
Any characters can be included within a CSS comment, as long as they are enclosed within the opening and closing slash and asterisks syntax (/* */). I prefer to add dashes underneath the text, to visually block out these sections. Then I’ll use this same comment style to organize other groupings of related styles for the specific portions of the webpage.
I always start with the base CSS, which are styles that are applied globally. Then add more specific styles as needed. When I say global CSS, I’m referring to the styles that are applied to all or most of the elements on the page, such as the font-family, defining font colors, general margin and padding styles and font sizes. These global styles are applied to the basic type selectors such as body, headings and links. Then get more specific as needed by applying styles using CSS classes. Even then, start with the more generic class styles like page wrappers and page layout styles.
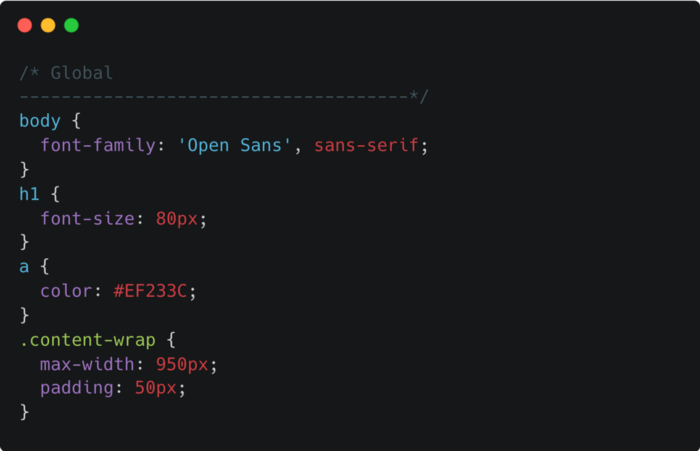
As the project progresses, CSS styles can be added into related groupings such as the header and footer or specific page content, to keep things organized and easy to find.
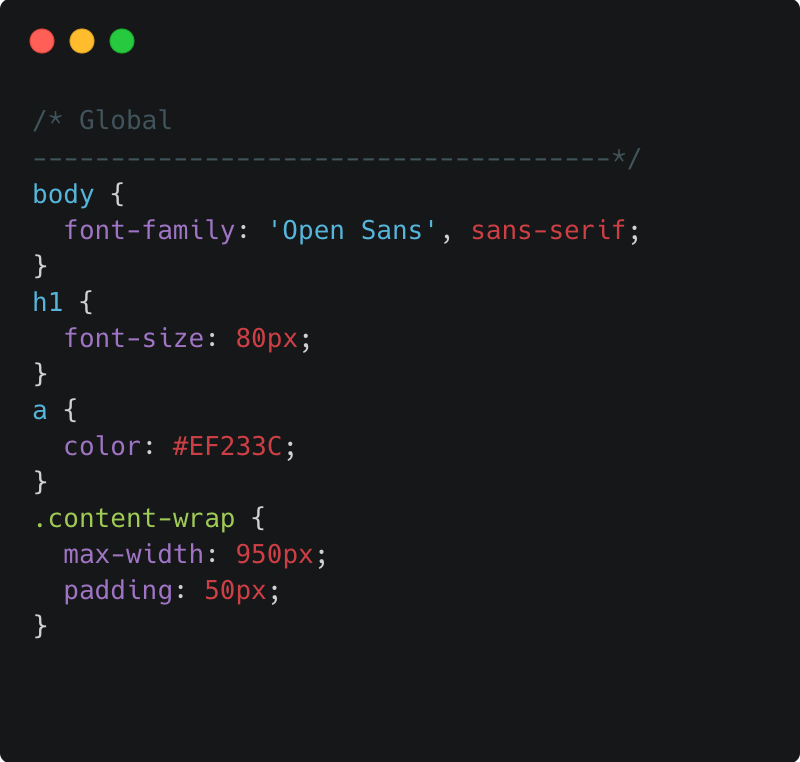
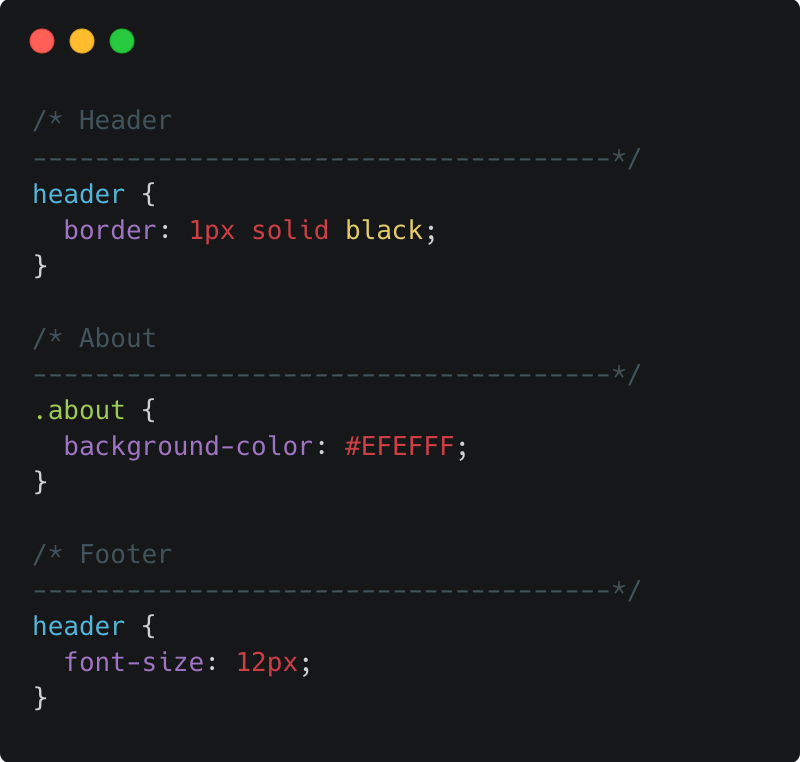
There is only so much planning that can be done in advance but starting off with some organizational rules will help to write more thoughtful CSS.
Reduce repetitive code
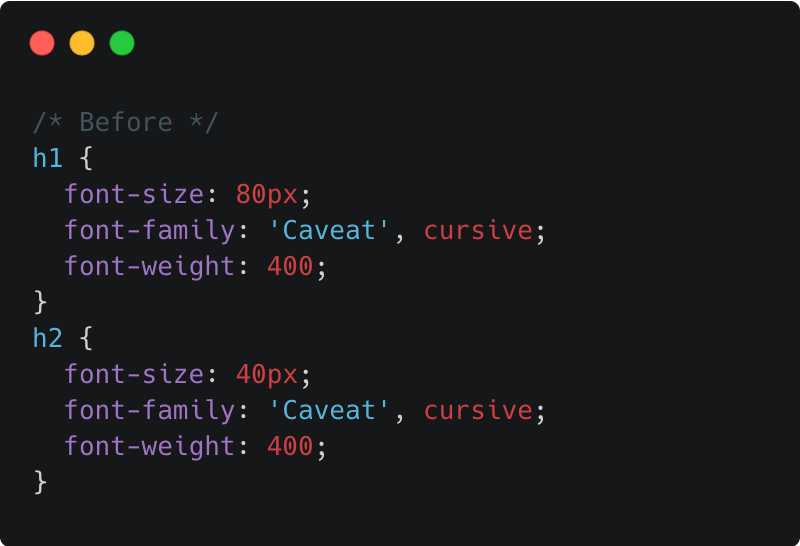
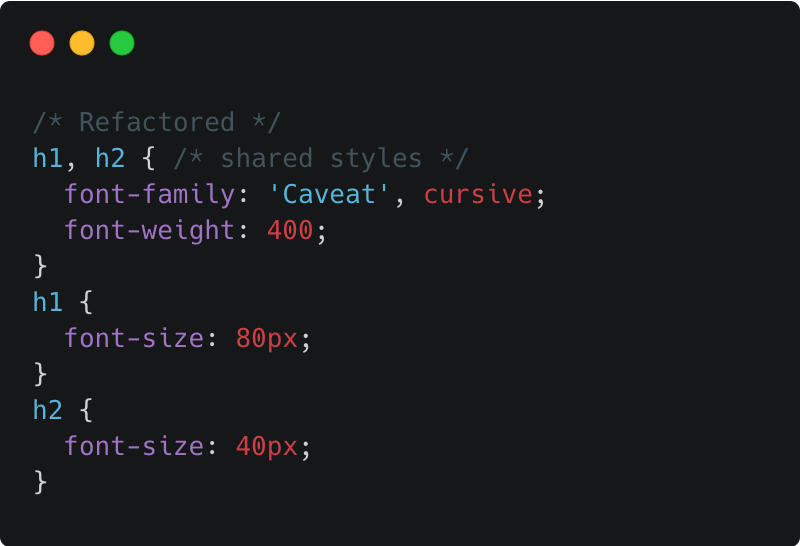
If you notice that you are declaring the same styles over and over again, this a good indicator that you could probably do some refactoring. Let’s go over a couple ways to make repetitive code more efficient.
Combining selectors
Combine selectors to target multiple elements at the same time and use the separate declaration blocks for specific element styles. It’ll be easier to make updates to the shared styles and will reduce the amount of code.
Create reusable classes
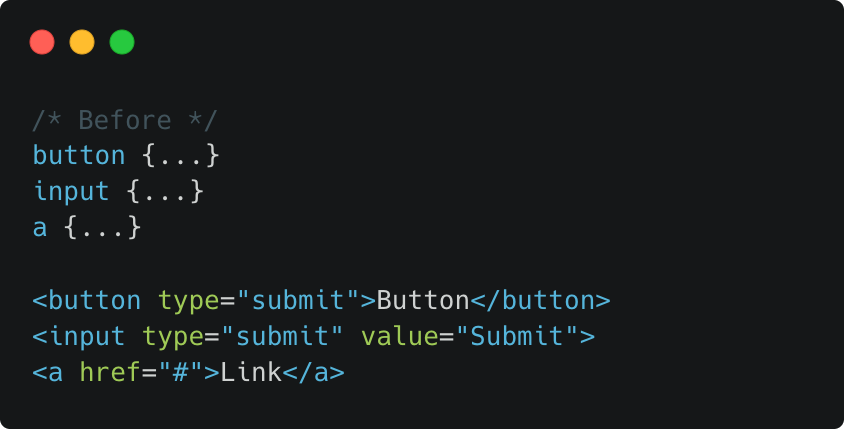
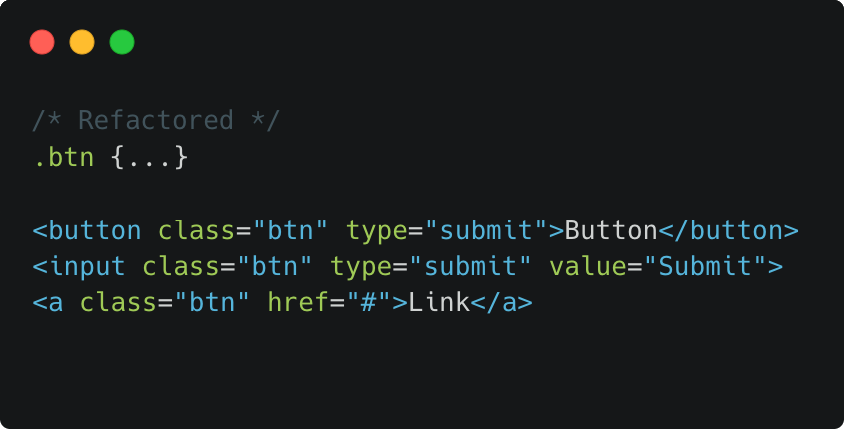
Creating reusable classes will also also reduce repetitive code. Instead of writing the same style for each element with a different selector, create a shared class that can be added to multiple elements. In the following example, the refactored code uses one shared “btn” class.
Use inheritable CSS styles
Most styles can also be inherited from the parent element. So if there are styles that are common for most of the page elements, it’s better to add the CSS to a parent selector, rather than declaring the same style over and over again to each element. Let the CSS do the work for you. Then override it when necessary with a more specific selector.
For example set the font-family using the body selector to apply it to all the text elements on the page such as paragraphs, headings and links. But if you want specific styles for the headings, then override just what you need using the specific heading selector.

Reduce CSS specificity
When refactoring CSS, try to reduce specificity issues such as over qualifying selectors, which is using selectors that are more specific than it needs to be. In the this example, the selector indicates that it’s a style specifically for an image element that also contains a class of “thumbnail.”

Even if you plan to only use this class with an image tag, just use the class as the selector. That way, if you realize that you need to add a container around it, the selector will apply to just the class name, regardless of what element it is attached to. This will also make the class reusable.
In the following Codepen example, remove “img” from the CSS selector to remove the over-qualification and apply the styles to any element.
See the Pen
Reduce specificity by Christina Truong (@christinatruong)
on CodePen.0
Maybe you have several different thumbnail styles that can’t be re-used but you want to differentiate them. To avoid over-qualifying the selectors, try using more descriptive class names. Instead of img.thumbnail and div.thumbnail, use .thumbnail-image and .thumbnail-container.
Another way to reduce specificity is to use more efficient selectors. For example, when selecting nested elements, you don’t have to select the whole family tree. You can skip a level or two. Take a moment to determine how specific you need to be. Looking at the following HTML, there are several ways to select the links based on how specific you need the matching pattern to be.
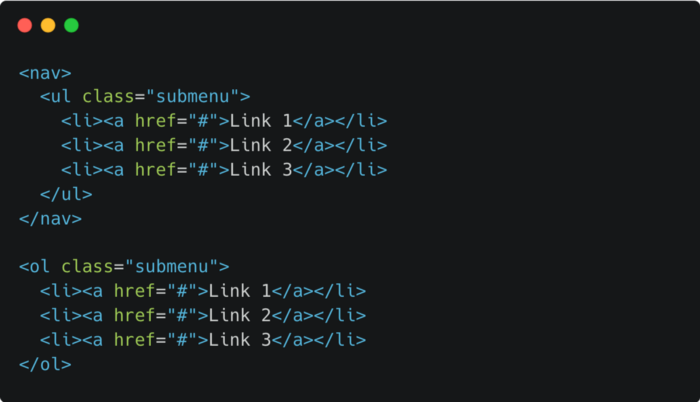
Do you need to select links, in a “submenu,” in a nav? If so, then use:

If you need to select only links in a “submenu” that specifically uses an ordered list, then use:

But if you just need all the links in any submenu, use the most direct and simple way to get there:

Pick the most generic option and get only as specific as you need to be. The browser has to cycle through each selector to process it, so using the least amount of selectors as possible will also help with efficiency. You can always make it more specific later, if needed.
If you have deadlines looming overhead, writing code that works often takes precedent over writing code that works well. It’s also a natural part of learning. It takes time and experience to learn how to write more efficient code. So whether you’re taking some time to refactor your code or starting a new project, keep these tips in mind. And getting into the habit of constantly refactoring as you go along can make it less daunting, rather than waiting until the end.


0 Commentaires